Acronis Cyber Backup 12.5: Creating a Bootable Media
- Plug in an empty USB with at least 2GB of space to the VM Host that is hosting your Acronis Management Server VM
- Note: you can also create a bootable .ISO or a bootable CD/DVD by changing the setting during step 14
- Connect the USB device to the Acronis Management Server VM (NJ-xxxx-BS01/BS02)
- Log into the VM Host and navigate to "Virtual Machines"
- Find the Acronis Management Server VM, right-click it and select "Edit Settings"
- Click "add other device" and select "USB device". Your empty USB should now appear in the list of VM hardware. Click Save.
- To confirm the USB device is connected, open the Windows console of the Acronis VM and find the USB device in File Explorer
- On the machine where Acronis Management Server is installed, click Start and start typing "Run bootable media builder" in the search box
- Click Run Bootable Media Builder
- Acronis Media Builder starts. Click Next.
- On the license key step, select "Create the media without specifying a license key (Only recovery will be available)", as we will only be using these bootable USBs for recovery
- On the "Select the bootable media type to create" step, select "Windows-like representation"
- On the "Advanced settings" step, make sure "As on the target machine" is selected for the firmware interface that Windows will use after recovery
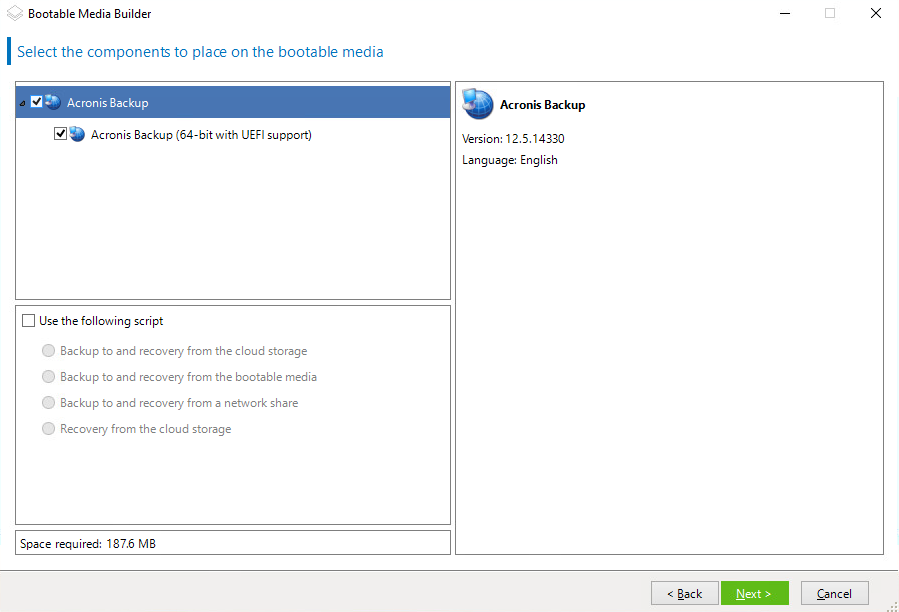
- On the "Select the components to place on the bootable media" step, check off the boxes for Acronis Backup and Acronis Backup (64-bit with UEFI support):
- On the "Review the options and change the settings if necessary" step, navigate to "Network settings"
- Select the proper NIC (usually nic0)
- Uncheck "Configure the settings automatically" and enter the IP address, subnet mask, and the rest of the applicable network settings that you want the target recovery machine to use. This can be any empty IP address on the network that will allow you to access the NAS where the Acronis Backups are stored. If you are unsure of these settings, check the box next to "Configure the settings automatically". You will be able to change these network settings while using the bootable media.
- On the "Select media output" prompt, select your USB device from the list and click Next
- On the review screen, click Proceed and allow the Media Builder to create you Bootable Recovery USB.
- When the wizard shows complete, you are done. Disconnect the USB from the VM, unplug from the VM host, and keep in a safe place for future use.
Related Articles
Using Acronis True Image to Restore a Backup
Things You'll Need: Target machine External USB HDD/SSD containing a working image of the computer you want to restore (if no DVD drive on target machine): external USB DVD Drive Acronis bootable media -- flash drive or DVD Monitor, keyboard, mouse ...
Dell Wyse Thin Client - Flashing a New Image
Overview This is a step-by-step instruction on how to create a bootable USB for imaging Dell Wyse Thin Clients using the tools provided by Dell Process Download and Install – Dell Wyse USB Firmware Tool: ...
AC Power Recovery BIOS setting
Symptom You want your Advantech UNO-2484G brick computers to power on when AC power is detected, but cannot find the setting in the system's BIOS. Environment Primary Product Module: Advantech Primary Product Version: UNO-2484G Cause The AC power ...
B&R Installer Fails at "Provide License": "The user don't trust the certificate or the admin policy has disabled user trust. Error: 0x80096005"
Using the Backup and Replication 9.5.4.2866 Update 4b iso, the Veeam installer will fail after at the "Provide License" dialogue with the following error: "The user don't trust the certificate or the admin policy has disabled user trust. Error: ...
APC 700 UPS with PowerChute software/Setup
SETUP 1) Connect PC power supply to the UPS (rear, left hand side) MASTER AC POWER (top outlet) 2) Connect the Data to USB cord (provided with Back-UPS) to the UPS (Data Port) and the USB side of cable to your PC 3) IMPORTANT – Be sure to connect the ...
